Skip to content
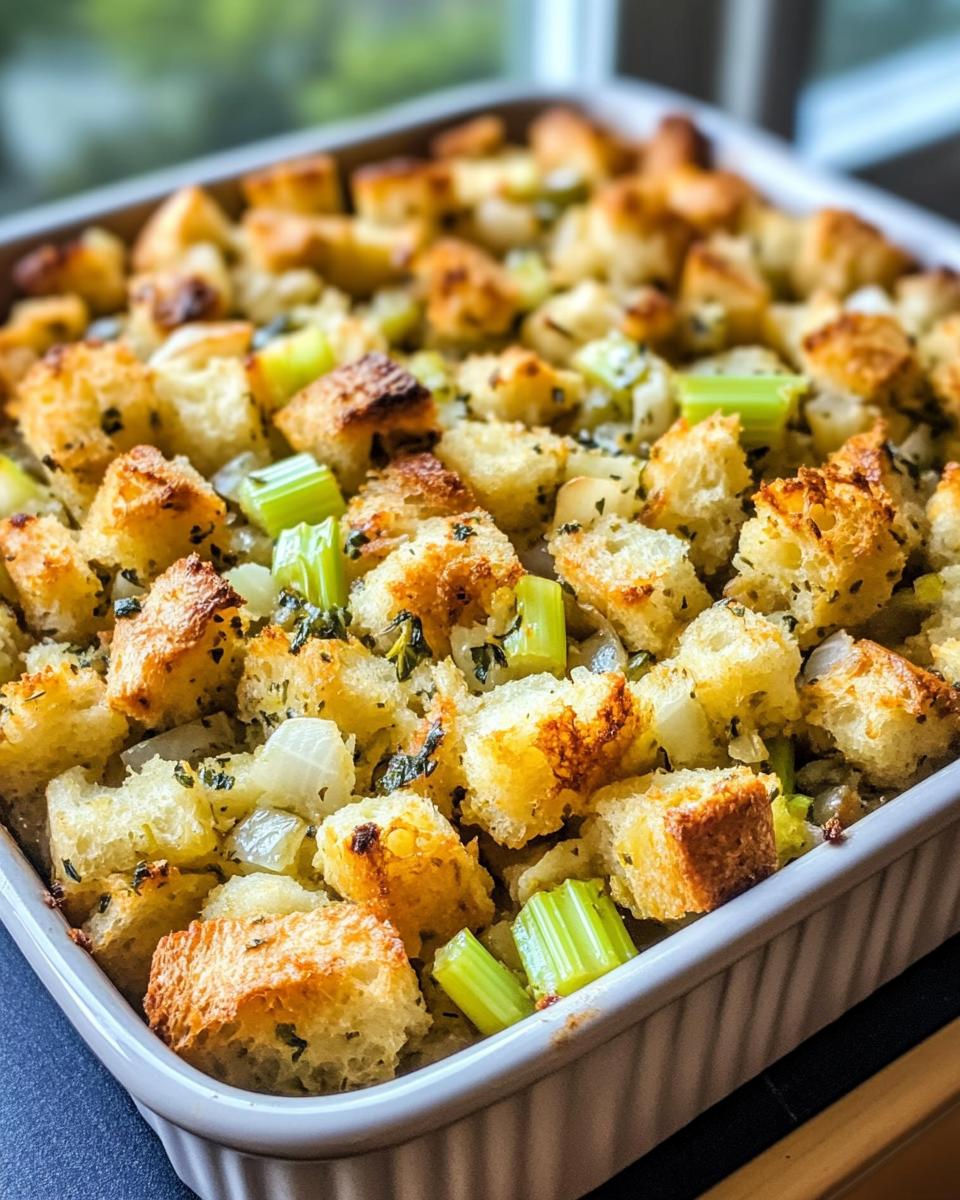
You know that moment when you take your first bite of holiday stuffing and just sigh with happiness? That’s exactly what I wanted to recreate when I developed this sugar free holiday stuffing recipe. After years of tweaking (and maybe a few stuffing disasters), I finally nailed it – a side dish that’s packed with all the cozy, savory flavors you crave, but without any added sugar sneaking in.
What I love most is how this stuffing proves healthy doesn’t mean boring. The combination of whole-grain bread, aromatic herbs, and slowly cooked veggies creates layers of flavor that’ll have everyone reaching for seconds. And trust me, no one will even notice it’s sugar-free – it’s that good!
This recipe became our family’s go-to after my dad was diagnosed with diabetes. Now it’s the one dish everyone requests at our holiday gatherings, from Thanksgiving straight through New Year’s. The best part? It comes together in about 50 minutes start to finish, leaving you plenty of time to focus on the turkey (or enjoy a glass of wine!).
Why You’ll Love This Sugar Free Holiday Stuffing
There’s a reason this stuffing has become my most-requested holiday recipe – it checks every box for a perfect side dish. Let me count the ways you’ll adore it:
- Bursting with flavor – The combo of thyme, sage, and slow-cooked onions creates that classic holiday aroma that’ll have everyone hovering near the oven
- Effortless to make – Just chop, mix, and bake (no fancy techniques required!)
- Naturally sweet from the caramelized veggies – no sugar needed
- Adapts to any diet – Already vegetarian and easily made gluten-free with your favorite bread
- Keeps beautifully – Tastes even better the next day as flavors meld
Honestly? The first time I made this, my sugar-loving uncle ate three helpings before realizing it was sugar-free. That’s when I knew I had a winner!
Ingredients for Sugar Free Holiday Stuffing
Here’s everything you’ll need to make this flavor-packed stuffing – and trust me, each ingredient plays a special role in creating that perfect holiday taste:
- 8 cups whole-grain bread cubes – About 1 loaf, cut into ½-inch pieces (stale bread works best here!)
- 1 cup diced celery – Chop it small so it blends nicely into every bite
- 1 cup diced yellow onion – Sweet onions work beautifully when caramelized
- 2 tbsp olive oil – Our healthy fat for sautéing those gorgeous aromatics
- 1 tsp garlic powder – The perfect shortcut when you’re juggling multiple dishes
- 1 tsp dried thyme – That classic holiday herb we all love
- 1 tsp dried sage – The stuffing superstar that adds earthy warmth
- ½ tsp black pepper – Freshly ground if you’ve got it
- ½ tsp salt – Optional, but helps all the flavors pop
- 1½ cups low-sodium vegetable broth – The magic moisture that brings it all together
Pro tip: I always measure my bread cubes after cubing, not before – you’d be surprised how much volume changes when you chop it up! And don’t stress about exact vegetable sizes – rustic is totally fine here.
Equipment You’ll Need
Grab these kitchen staples – nothing fancy, just the basics to make your sugar free holiday stuffing shine:
- Large mixing bowl – Big enough to toss all those goodies together
- 9×13-inch baking dish – My go-to for perfect crispy edges
- Skillet or sauté pan – For caramelizing those onions to golden perfection
- Wooden spoon – My trusty sidekick for stirring and scraping
- Chef’s knife & cutting board – For prepping all those fresh ingredients
That’s it! No special gadgets needed – just good old-fashioned kitchen tools you probably already have.
How to Make Sugar Free Holiday Stuffing
Okay, let’s get cooking! I promise this is one of those recipes where the smell alone will have your whole family gathering in the kitchen. Here’s exactly how I make my foolproof sugar free holiday stuffing every time:
Step 1: Prep the Bread and Vegetables
First things first – grab that whole-grain bread and start cubing. I like pieces about ½-inch big – small enough to soak up all that delicious broth, but not so tiny they turn mushy. Don’t worry about perfection here – rustic chunks add great texture!
While you’re at it, dice up your celery and onion into similar small pieces. I aim for about ¼-inch dice so they cook evenly and blend beautifully into every bite. The key here is consistency – you want all the veggies to soften at the same rate.
Step 2: Sauté the Aromatics
Now for the good stuff! Heat your olive oil in a skillet over medium heat – you’ll know it’s ready when a small piece of onion sizzles gently. Add your diced onions and celery, stirring occasionally. We’re not rushing this part – let them cook for about 5 minutes until they’re soft and just starting to turn golden.
Pro tip from my many stuffing experiments: That moment when the onions become translucent and your kitchen smells amazing? That’s when you know you’ve hit the sweet spot (without any actual sugar!).
Step 3: Combine and Bake
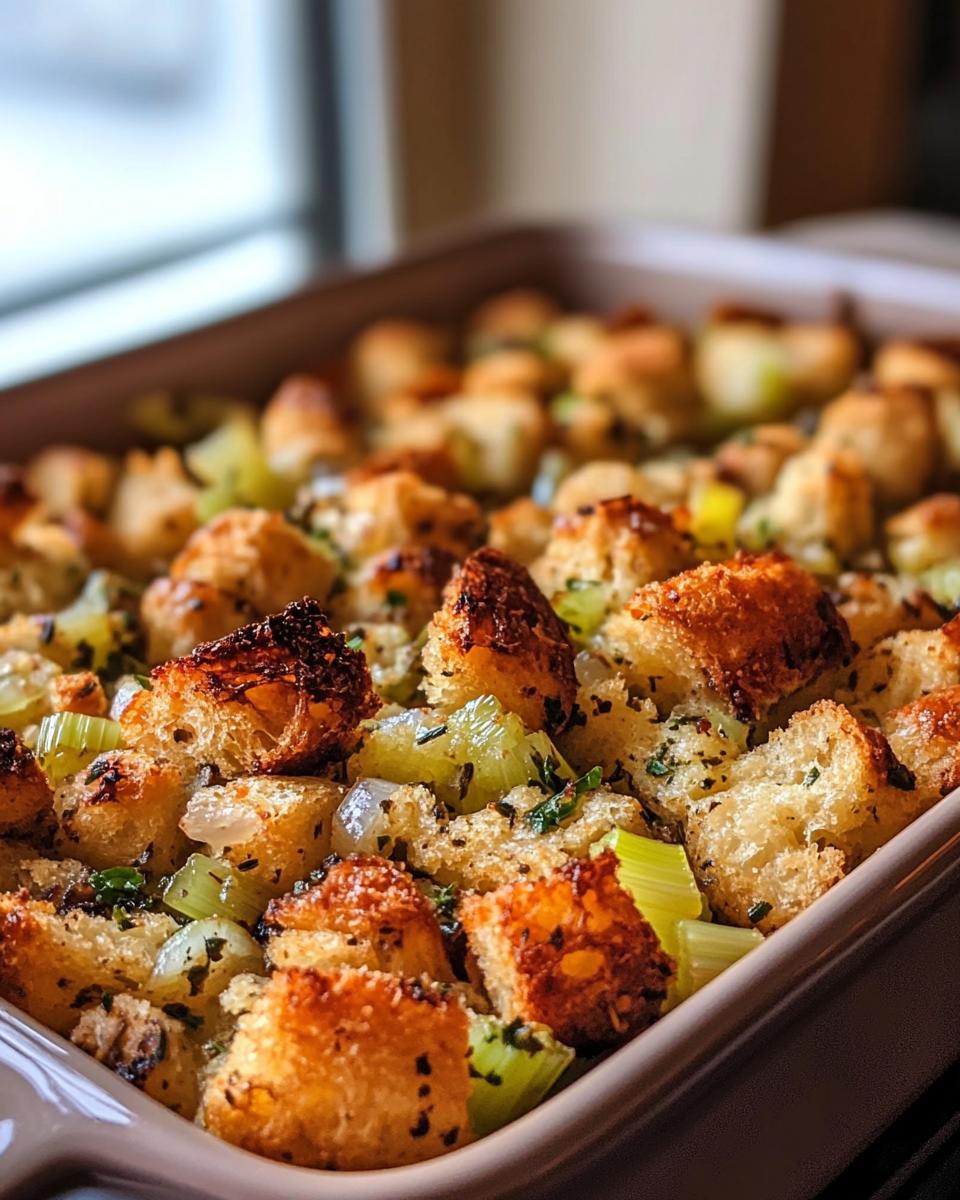
Time to bring it all together! In your big mixing bowl, toss the bread cubes with those gorgeous sautéed veggies and all the seasonings. Here’s where the magic happens – slowly pour in the vegetable broth while gently stirring, making sure every piece gets some love.
Transfer everything to your greased baking dish, cover with foil, and pop it in a 350°F oven for 25 minutes. Then comes my favorite part – remove the foil and bake another 10 minutes until you’ve got that perfect golden-brown crust on top. The wait might kill you (the aroma is insane), but trust me – it’s worth it!
Tips for Perfect Sugar Free Holiday Stuffing
After making this stuffing more times than I can count (holiday seasons will do that to you!), I’ve picked up some golden rules for the absolute best results every time:
- Stale bread is your friend – Let cubes sit out overnight for better texture (fresh bread turns mushy)
- Moisture control is key – The bread should feel damp but not swimming when mixed (add broth gradually)
- Herb freshness matters – Rub dried herbs between your fingers before adding to wake up their oils
- Don’t skip the foil step – Those first 25 covered minutes ensure even cooking throughout
- Test with a spoon – The top should be crispy while the center stays slightly springy when done
My biggest lesson? Resist the urge to stir after baking – those crispy edges are the best part!
Ingredient Substitutions & Variations
One of the best things about this sugar free holiday stuffing? It’s crazy adaptable to whatever you’ve got on hand or dietary needs. Here are my favorite twists after years of holiday testing:
- Bread swaps: Gluten-free bread works beautifully (just toast it first for better texture). Day-old sourdough adds lovely tang, or try cornbread for a Southern twist!
- Veggie variations: Mushrooms sautéed with the onions add umami depth, while diced apples bring subtle sweetness without sugar.
- Herb alternatives: Fresh herbs? Use triple the amount (so 1 tbsp instead of 1 tsp). Rosemary makes a festive addition during Christmas.
- Crunchy add-ins: Toasted pecans or walnuts give wonderful texture – just stir in ½ cup before baking.
- Broth options: Chicken broth adds richness if you’re not vegetarian, or use mushroom broth for extra earthiness.
My golden rule? Taste as you go – every kitchen and palate is different. The base recipe is forgiving, so make it your own!
Serving Suggestions for Sugar Free Holiday Stuffing
Oh, the places this stuffing will go on your holiday table! It’s honestly the most versatile side dish I make. Of course, it’s absolute perfection next to a classic roasted turkey with all the gravy – the savory herbs in the stuffing just sing when they mingle with those turkey juices. But don’t stop there!
We love it with baked ham during Christmas, and it’s become our go-to with holiday pot roast too. For our vegetarian friends? It’s fantastic alongside mushroom Wellington or stuffed squash. Honestly, I’ve even been known to fry up leftovers with eggs for breakfast the next day – don’t judge me until you’ve tried it!
Storage and Reheating Instructions
Okay, here’s the beautiful thing about this sugar free holiday stuffing – it might actually taste better the next day! Let it cool completely first (I know, the temptation is real), then pop it in an airtight container in the fridge. It’ll stay perfect for 3-4 days.
When you’re ready for round two, my favorite trick is reheating in the oven at 350°F for about 15 minutes. This brings back that wonderful crispy top. If you’re in a hurry, the microwave works too – just sprinkle with a tablespoon of broth first to keep it from drying out. And if you’ve got more than you can eat? This stuffing freezes beautifully for up to 3 months – just thaw overnight in the fridge before reheating.
Nutritional Information
Just so you know, these numbers are estimates based on the exact ingredients I use – yours might vary slightly depending on your bread choice or veggie sizes. Each generous serving comes in at about 150 calories with just 2g of natural sugars from the veggies. It’s packed with 3g of fiber too, thanks to that whole-grain bread! Not too shabby for a holiday dish that tastes this indulgent, right?
Frequently Asked Questions
I get asked these questions every holiday season – so let me save you some time with my tried-and-true answers!
Can I make sugar free holiday stuffing ahead of time?
Absolutely! In fact, I often prep everything up to the baking step the night before. Just combine all ingredients in the baking dish, cover tightly, and refrigerate. When you’re ready, pop it straight into a preheated oven (add about 5 extra minutes to the covered baking time). The flavors actually develop even more beautifully when it sits!
What’s the best bread to use for sugar free stuffing?
My go-to is whole-grain sandwich bread – it holds up beautifully and adds great texture. But really, any hearty bread works! Just avoid anything too soft or sweet. Day-old bread is perfect, or toast fresh bread cubes at 300°F for 10 minutes to dry them out first.
How do I know when my stuffing is fully cooked?
Look for three signs: 1) The top should be golden brown and slightly crisp 2) The edges will pull away from the pan slightly 3) When you insert a spoon into the center, it should come out with moist crumbs (not wet batter). Remember – it keeps cooking a bit as it cools!
Can I freeze leftover sugar free stuffing?
Yes! This is one of my favorite make-ahead tips. Portion cooled stuffing into freezer bags or containers (I do individual servings for easy meals). Thaw overnight in the fridge, then reheat in a 350°F oven for about 15 minutes to bring back that perfect texture.
Share Your Thoughts
Nothing makes me happier than hearing how this sugar free holiday stuffing turns out in your kitchen! Did your family go back for seconds? Find a new favorite variation? I’d love to hear your stories – drop me a note in the comments below. After all, the best recipes are the ones we share!
Print
Irresistible Sugar Free Holiday Stuffing in Just 50 Minutes
- Total Time: 50 minutes
- Yield: 8 servings 1x
- Diet: Low Calorie
Description
A delicious sugar-free stuffing perfect for holiday meals. Made with wholesome ingredients, it’s flavorful and easy to prepare.
Ingredients
- 8 cups whole-grain bread, cubed
- 1 cup celery, diced
- 1 cup onion, diced
- 2 tbsp olive oil
- 1 tsp garlic powder
- 1 tsp dried thyme
- 1 tsp dried sage
- 1/2 tsp black pepper
- 1/2 tsp salt (optional)
- 1 1/2 cups low-sodium vegetable broth
Instructions
- Preheat oven to 350°F (175°C).
- Heat olive oil in a pan over medium heat.
- Sauté celery and onion until soft, about 5 minutes.
- In a large bowl, mix bread cubes, sautéed vegetables, garlic powder, thyme, sage, pepper, and salt.
- Pour vegetable broth over the mixture and stir until evenly moistened.
- Transfer to a greased baking dish and cover with foil.
- Bake for 25 minutes, then remove foil and bake another 10 minutes until golden brown.
Notes
- For extra flavor, add chopped fresh herbs before baking.
- Store leftovers in an airtight container for up to 3 days.
- Prep Time: 15 minutes
- Cook Time: 35 minutes
- Category: Side Dish
- Method: Baked
- Cuisine: American
Nutrition
- Serving Size: 1/8 of recipe
- Calories: 150
- Sugar: 2g
- Sodium: 200mg
- Fat: 5g
- Saturated Fat: 1g
- Unsaturated Fat: 3g
- Trans Fat: 0g
- Carbohydrates: 22g
- Fiber: 3g
- Protein: 4g
- Cholesterol: 0mg