Skip to content
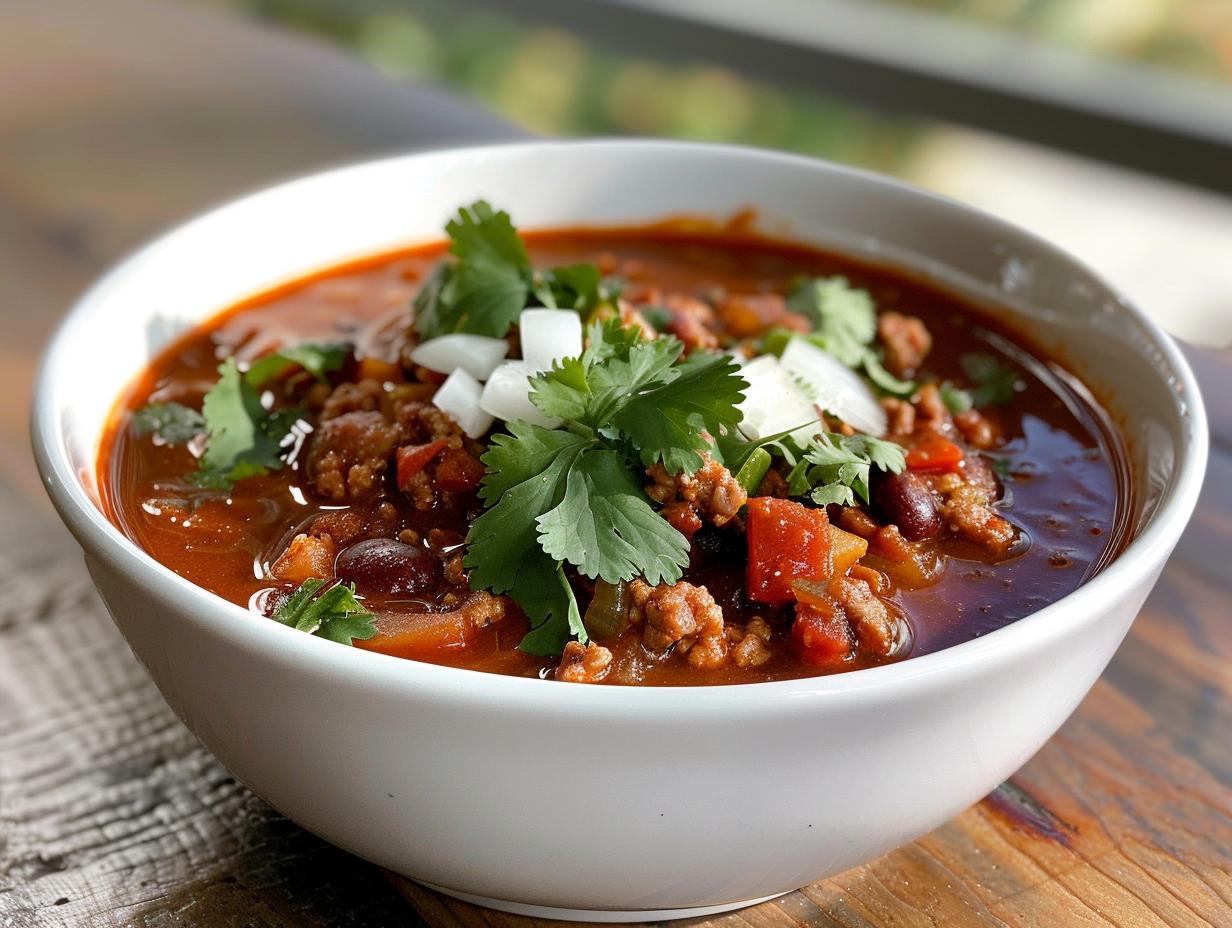
You know those nights when you’re craving something warm, filling, and packed with flavor—but still want to stick to your keto goals? This hearty keto chili with no beans is my go-to solution. It’s loaded with rich, savory goodness from ground beef and pork, simmered in a spiced tomato base that’ll have you forgetting beans were ever a thing. Trust me, the depth of flavor here is unreal, and the best part? It’s ready in under an hour. Whether you’re meal prepping or need a quick weeknight dinner, this chili delivers all the comfort without the carbs. Pass the shredded cheese and dig in!
Why You’ll Love This Hearty Keto Chili with No Beans
Let me tell you why this chili is about to become your new best friend:
- Crazy flavorful without the carbs – Who needs beans when you’ve got this rich, meaty goodness? The blend of spices and tomatoes gives it that classic chili depth you crave.
- Weeknight lifesaver – From chopping to serving, it’s done in under an hour. (Perfect for when hunger strikes and patience is low.)
- Meal prep magic – It tastes even better the next day and freezes like a dream. I always double the batch!
- Protein powerhouse – With both beef and pork, it’ll keep you full for hours without the carb crash.
- Totally customizable – Pile on cheese, avocado, or sour cream – it’s all fair game in keto land!
Seriously, this chili checks all the boxes. Your taste buds (and your macros) will thank you.
Ingredients for Hearty Keto Chili with No Beans
Alright, let’s talk ingredients! This is where the magic starts. I’ve made this chili so many times I could probably recite this list in my sleep. The key here is quality – good meat and fresh veggies make all the difference.
The Meat (Because This Is Keto, After All)
- 1 lb ground beef (80/20 blend) – That bit of fat adds so much flavor. If you’re using leaner beef, you might need an extra drizzle of olive oil.
- 1 lb ground pork – The pork gives it this incredible richness. No pork? No problem – just use all beef.
The Veggie Base
- 1 medium onion, diced (about 1 cup) – Yellow onions work best here for their balance of sweetness and bite.
- 3 cloves garlic, minced – Fresh is best! That pre-minced stuff just doesn’t give the same punch.
- 1 bell pepper, diced – Any color works, but red adds a touch of sweetness if you’ve got it.
The Liquid Gold
- 1 can (14.5 oz) diced tomatoes – Don’t drain them! That juice adds great flavor.
- 1 can (6 oz) tomato paste – This is our flavor concentrator. If you only have the tiny cans, that’s about 3/4 of one.
- 2 cups beef broth – Homemade if you’re fancy, but boxed works just fine. Chicken broth works in a pinch.
- 2 tbsp olive oil – For sautéing all those goodies.
The Spice Squad
- 2 tbsp chili powder – This is your flavor backbone. Want it smoky? Use chipotle chili powder for half of it.
- 1 tsp cumin – That earthy warmth is non-negotiable.
- 1 tsp paprika – Sweet or smoked, your call.
- 1/2 tsp black pepper – Freshly cracked if you can!
- 1/2 tsp salt – Plus more to taste at the end.
Pro tip: If you like a little heat (and who doesn’t?), keep some cayenne or crushed red pepper flakes handy. Start with 1/4 tsp and go from there. And if you’ve got some fresh cilantro hanging around, chop some up for garnish – it adds such a bright pop at the end!
How to Make Hearty Keto Chili with No Beans
Okay, let’s get cooking! This chili comes together in just a few simple steps, but each one builds layers of flavor. I’ve made this so many times I could do it with my eyes closed (though I don’t recommend that – hot oil and all). Follow along and you’ll have a pot of cozy, low-carb goodness in no time.
Step 1: Sauté the Vegetables
First things first – grab your biggest, heaviest pot. I use my trusty Dutch oven because it holds heat so well. Heat the olive oil over medium heat until it shimmers (about 1 minute). Toss in your onions, garlic, and bell pepper with a pinch of salt. The salt helps draw out moisture and speeds up the softening process. Stir occasionally, letting them cook until the onions turn translucent and the peppers soften – about 5 minutes. You’ll know it’s right when your kitchen smells like heaven and the onions look glossy. Careful not to brown the garlic or it’ll turn bitter!
Step 2: Brown the Meat
Now for the good stuff! Crumble in the ground beef and pork, breaking it up with your spoon as it cooks. I like to use a potato masher for this – weird trick, but it makes perfect little crumbles every time. Cook until there’s no pink left, about 7-8 minutes. Don’t rush this step – proper browning equals mega flavor. If there’s lots of fat, you can drain some, but leave about 2 tablespoons for richness. This is when I usually sneak a taste and adjust the salt – the meat should be well-seasoned before adding other ingredients.
Step 3: Add Remaining Ingredients
Time to bring it all together! Stir in the diced tomatoes (with their juices!), tomato paste, beef broth, and all those glorious spices. The tomato paste might look thick at first, but keep stirring – it’ll melt into the broth beautifully. Scrape up any tasty browned bits stuck to the bottom of the pot – that’s pure flavor gold! This is also when I add any extra heat if I’m feeling spicy. Give everything a really good stir to distribute the spices evenly – nobody wants a bite that’s all cumin and no chili powder.
Step 4: Simmer to Perfection
Bring your chili to a lively bubble, then immediately reduce the heat to low. You want it at a gentle simmer, not a rolling boil. Cover it partially with a lid – I leave mine about halfway on to prevent splatters but still let some steam escape. Now walk away (but not too far!) for 30 minutes. The magic happens as it simmers – the flavors meld, the liquid reduces, and the texture thickens to that perfect chili consistency. Give it an occasional stir to prevent sticking. You’ll know it’s done when you can drag a spoon across the bottom and the chili doesn’t immediately flood back – about the thickness of a good stew. Taste and adjust the salt if needed, then let it rest off the heat for 5 minutes before serving (this helps the flavors settle).
Quick tip: If your chili looks too thin after simmering, leave the lid off for the last 10 minutes to help reduce. Too thick? Add a splash of broth or water. Easy peasy!
Tips for the Best Hearty Keto Chili with No Beans
After making this chili more times than I can count, I’ve picked up some tricks that take it from good to “oh my gosh, can I have the recipe?” level. Here are my secrets:
1. Spice it your way
Chili should suit your taste buds, not the other way around! Start with the recipe’s spice amounts, then taste halfway through simmering. Need more kick? Add a pinch of cayenne or swap in hot chili powder. Too intense? A teaspoon of cocoa powder (trust me!) or a splash of apple cider vinegar mellows the heat while adding depth.
2. Fresh herbs make all the difference
Stir in a handful of chopped fresh cilantro right before serving for a bright pop. If you’re not a cilantro person (I get it), fresh oregano or parsley works too. Dried herbs? Add them with the other spices so they have time to rehydrate and release their oils.
3. The freezer is your friend
This chili freezes like a dream – I always double the batch! Let it cool completely, then portion into freezer bags laid flat (saves space) or mason jars (leave 1-inch headspace). Thaw overnight in the fridge, then reheat gently on the stove with a splash of broth to refresh the texture.
4. Brown your meat properly
Don’t just gray it – really brown it! Crank the heat to medium-high when cooking the meat until you get crispy bits in the pan. Those caramelized bits = flavor bombs. And here’s my weird trick: pat the meat dry with paper towels before adding it to the pot. Less steam, better browning!
5. Low and slow wins the race
If you’ve got extra time, let the chili simmer uncovered for an extra 15-20 minutes. The flavors deepen incredibly, and the texture becomes luxuriously thick. Just stir occasionally to prevent sticking. (Perfect for lazy Sundays when the whole house should smell amazing anyway.)
Bonus tip: For restaurant-style richness, stir in a tablespoon of butter right before serving. It sounds crazy, but that glossy finish and rounded flavor? Worth every calorie.
Serving Suggestions for Hearty Keto Chili with No Beans
Now, let’s talk about the best part—loading up that bowl! A great chili is like a blank canvas, just waiting for your favorite toppings. Here’s how I love to serve mine (and trust me, I’ve tried every combo under the sun):
Must-Have Toppings
- Shredded cheddar or Monterey Jack cheese – Because melty cheese makes everything better. I like to shred my own—it melts smoother than the pre-shredded stuff.
- Dollop of sour cream – The cool creaminess cuts through the chili’s richness perfectly. Full-fat for keto, of course!
- Sliced avocado or guacamole – That buttery texture? Divine. Plus, it adds healthy fats.
- Fresh cilantro or green onions – For a pop of color and freshness. My husband picks his off (heathen), but I pile it on.
- Pickled jalapeños – If you like a tangy kick. I keep a jar in my fridge just for chili nights.
Keto-Friendly Sides
This chili is plenty filling on its own, but if you want to round out the meal:
- Cauliflower rice – My go-to! It soaks up the chili juices beautifully. Pro tip: sauté it in butter with a pinch of salt first.
- Cheesy keto cornbread – Almond flour version, obviously. Warm and crumbly—perfect for dipping.
- Crispy bacon bits – Because why not? I bake extra bacon just for this purpose.
- Simple green salad – Tossed with olive oil and lemon for a fresh contrast.
Fun idea: Set up a chili bar with all the toppings in little bowls. Let everyone customize their own—kids love this (and so do adults, let’s be honest). Just watch out for sneaky carb-laden toppings that might wander in!
Storage and Reheating Instructions
Okay, let’s talk leftovers—because this chili tastes even better the next day! (And the day after that.) Here’s how to keep it fresh and reheat it like a pro:
Fridge Storage
Let the chili cool to room temperature first—no one wants a steamy container fogging up the fridge. Transfer it to an airtight container (I love glass ones because they don’t absorb smells), and it’ll stay good for 3 days. The flavors actually deepen overnight, so consider this your secret meal prep weapon. Just give it a good stir before reheating—sometimes the fats separate a bit, and that’s totally normal.
Freezer Magic
This chili freezes like a dream! I always double the batch just for this reason. Here’s my method:
- Portion it out: Ladle cooled chili into freezer-safe bags or containers. I do individual servings for quick lunches or family-sized portions for easy dinners.
- Flat is best: For bags, squeeze out excess air and lay them flat to freeze. Stack ‘em like books later—space saver!
- Label everything: Write the date with a Sharpie (trust me, future you will thank you). It stays tasty for 2 months, though mine never lasts that long.
Reheating Like a Boss
Stovetop method (my fave): Dump frozen or refrigerated chili into a pot with a splash of broth or water. Heat over medium-low, stirring occasionally, until bubbly and heated through (about 10 minutes for fridge-cold, 15-20 from frozen).
Microwave shortcut: Transfer a portion to a microwave-safe bowl, cover loosely, and zap in 1-minute bursts, stirring between each. Add a teaspoon of water if it looks dry. Usually takes 2-3 minutes total.
Pro tip: If your reheated chili seems a bit thin, simmer it uncovered for a few extra minutes to thicken. Too thick? More broth to the rescue! And always taste before serving—sometimes a pinch of salt or squeeze of lime wakes up the flavors.
Nutritional Information
Alright, let’s talk numbers – because tracking macros is part of the keto life, right? Now, I’m no nutritionist (just a chili enthusiast), so these values are estimates based on the ingredients I use. Your exact numbers might vary a tiny bit depending on brands or if you tweak the recipe (extra cheese, anyone?). Here’s the scoop per serving (about 1 generous cup):
- Calories: 320 – Perfectly satiating without going overboard
- Fat: 22g – All that good fat from the beef, pork, and olive oil keeps you full
- Protein: 25g – A solid protein punch for muscle maintenance
- Total Carbs: 8g – But wait, there’s more…
- Fiber: 3g – Thanks to all those veggies!
- Net Carbs: 5g – The number we keto folks care about most
Now, these numbers don’t include any toppings – so if you go wild with cheese and avocado (like I usually do), just factor those in separately. The best part? Even with toppings, this chili keeps you well under that 20g net carb limit while tasting like absolute comfort food. Win-win!
Quick note: For the most accurate tracking, always calculate based on your exact ingredients and portions. My fitness pal or similar apps make this super easy if you’re being precise. But honestly? This chili is so keto-friendly, I usually just enjoy it without stressing the small stuff!
Frequently Asked Questions
I get asked about this chili all the time—here are the questions that pop up most often in my kitchen (and my DMs!). Hopefully this covers what you’re wondering too. If not, just holler in the comments!
Can I Make This Chili in a Slow Cooker?
Absolutely! I love my slow cooker for busy days. Here’s how I adapt it: Brown the meat and sauté the veggies on the stove first (this step is non-negotiable for flavor). Then dump everything into your slow cooker and give it a good stir. Cook on low for 6 hours or high for 3-4 hours. The longer it simmers, the deeper the flavors get—just stir occasionally if you can. Pro tip: Leave the lid slightly ajar for the last hour if you want it thicker.
Is This Recipe Spicy?
As written, it’s got a mild-medium kick—enough to wake up your taste buds but not set your mouth on fire. The heat comes mostly from the chili powder. Want to adjust? Here’s how:
- Milder: Use half regular chili powder and half sweet paprika
- Hotter: Add 1/4-1/2 tsp cayenne with the other spices, or throw in a diced jalapeño with the bell pepper
- Custom heat: Serve with hot sauce on the side so everyone can dial it to their liking
Remember, spices bloom over time—it’ll taste spicier after simmering than when you first mix it!
Can I Add Beans?
Ah, the bean debate! Traditional chili often has them, but we skip beans here to keep it keto-friendly (they’re carb bombs, sadly). But if you’re not strict keto or making this for carb-eating friends, you could add a can of rinsed black or kidney beans. For a keto-approved alternative, try:
- Diced zucchini (adds bulk without carbs)
- Chopped mushrooms (meaty texture)
- Extra bell pepper (color and crunch)
My personal favorite? Roasted cauliflower florets—they soak up the chili flavors beautifully and add great texture!
How Can I Thicken the Chili?
If your chili looks too thin after simmering, don’t panic! Here are my go-to fixes:
- Simmer uncovered for 10-15 more minutes—the liquid will reduce naturally
- Xanthan gum (keto magic!): Whisk 1/4 tsp into 1 tbsp cold water, then stir into the chili
- Almond flour: Sprinkle in 1 tbsp at a time until desired thickness
Just avoid cornstarch or flour unless you’re not worried about carbs—those will work but kick you out of ketosis.
Can I Use Turkey Instead of Beef?
You sure can! Ground turkey makes a great leaner option. Since it’s less fatty, I recommend:
- Using 85/15 turkey (not the super lean stuff)
- Adding an extra tbsp of olive oil when browning
- Boosting flavor with 1/2 tsp extra cumin and a splash of Worcestershire (check carbs!)
The texture will be slightly different, but still delicious. For best results, stick with half turkey and half pork—that pork fat keeps it moist and flavorful!
Share Your Hearty Keto Chili with No Beans
Nothing makes me happier than seeing YOUR versions of this chili! Whether you stuck to the recipe or put your own spin on it, I want to hear all about your kitchen adventures. Did you add an extra kick of cayenne? Pile it high with avocado? Maybe your family fought over the last bowl? (Happens in my house every time.)
Drop a comment below to let me know how it turned out – your tips might help other readers too! And if you snapped a photo (you know I’m a sucker for melted cheese shots), tag me on Instagram @\[yourhandle] with #ketochililove. Seeing your creations seriously makes my day – it’s like our own little keto chili fan club!
Oh, and if you loved this recipe as much as we do, would you mind leaving a quick star rating? It helps others find this cozy bowl of goodness. Now grab a spoon and dig in – you’ve earned it!
Print
1 Pot Hearty Keto Chili with No Beans – Rich & Flavorful Bliss
- Total Time: 50 mins
- Yield: 6 servings 1x
- Diet: Low Carb
Description
A hearty and flavorful keto chili made without beans, perfect for a low-carb diet.
Ingredients
- 1 lb ground beef
- 1 lb ground pork
- 1 medium onion, diced
- 3 cloves garlic, minced
- 1 bell pepper, diced
- 1 can (14.5 oz) diced tomatoes
- 1 can (6 oz) tomato paste
- 2 cups beef broth
- 2 tbsp chili powder
- 1 tsp cumin
- 1 tsp paprika
- 1/2 tsp black pepper
- 1/2 tsp salt
- 2 tbsp olive oil
Instructions
- Heat olive oil in a large pot over medium heat.
- Add onion, garlic, and bell pepper. Cook until softened.
- Add ground beef and pork. Cook until browned.
- Stir in diced tomatoes, tomato paste, beef broth, and spices.
- Bring to a boil, then reduce heat and simmer for 30 minutes.
- Serve hot with your favorite toppings.
Notes
- For extra heat, add a pinch of cayenne pepper.
- Store leftovers in an airtight container for up to 3 days.
- Freezes well for up to 2 months.
- Prep Time: 10 mins
- Cook Time: 40 mins
- Category: Main Dish
- Method: Stovetop
- Cuisine: American
Nutrition
- Serving Size: 1 cup
- Calories: 320
- Sugar: 4g
- Sodium: 500mg
- Fat: 22g
- Saturated Fat: 7g
- Unsaturated Fat: 12g
- Trans Fat: 0g
- Carbohydrates: 8g
- Fiber: 3g
- Protein: 25g
- Cholesterol: 80mg