Skip to content
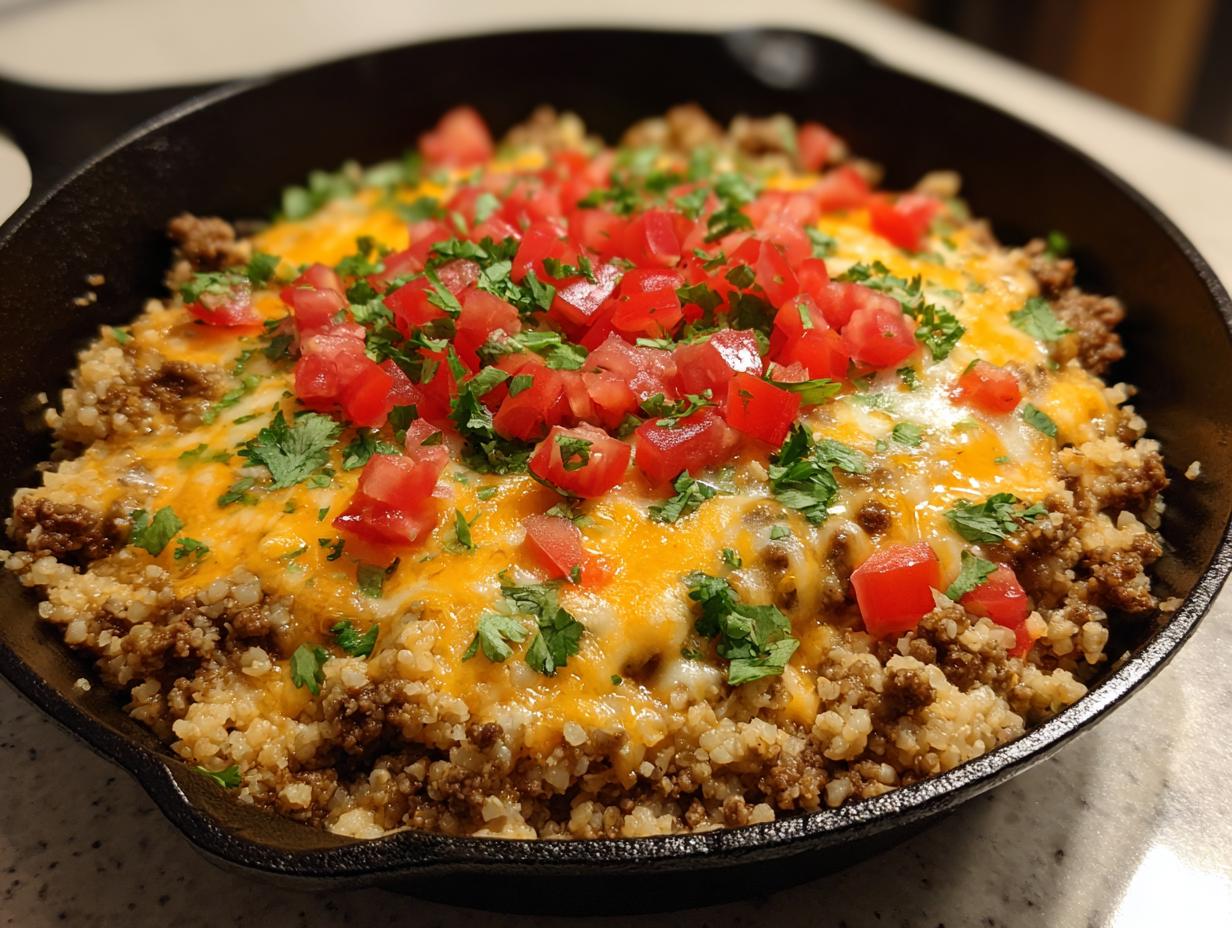
Oh my gosh, you guys – this Cheesy Keto Taco Skillet with Cauliflower Rice is my absolute go-to when I need something fast, filling, and totally guilt-free. I swear, it tastes like cheating on keto! The first time I made it, my husband didn’t even realize it was low-carb – he just kept going back for seconds. That melty cheddar mixed with savory taco-seasoned beef? Pure magic. And the cauliflower rice soaks up all those amazing flavors while keeping it light. It’s become my weeknight superhero – ready in under 30 minutes, packed with protein, and so darn satisfying. Trust me, this one’s a keeper!
Why You’ll Love This Cheesy Keto Taco Skillet with Cauliflower Rice
Listen, this isn’t just another “healthy” recipe that tastes like cardboard – this skillet is the real deal. Here’s why it’s about to become your new obsession:
- Crazy quick: From fridge to table in 25 minutes flat (perfect for those “I forgot to plan dinner” nights)
- Zero guilt: All the taco flavors you crave, but with just 6g net carbs per serving
- Cheese pull perfection: That melty cheddar blanket makes everything better (don’t even try to resist)
- Foolproof: Even my 12-year-old can make this without burning the kitchen down
- Leftover magic: Tastes even better the next day – if it lasts that long!
Seriously, this skillet checks ALL the boxes – easy, delicious, and totally keto-approved. You’re welcome!
Ingredients for Cheesy Keto Taco Skillet with Cauliflower Rice
Okay, let’s gather our cast of characters! Here’s everything you’ll need to make this taco skillet magic happen. Pro tip: measure everything before you start cooking – it makes the process SO much smoother when you’re not scrambling mid-sauté!
- 1 lb ground beef (80/20 works best for flavor, but leaner is fine too)
- 1 tbsp olive oil (or avocado oil if you prefer)
- 1 small onion, diced (about 1 cup – yellow or white both work great)
- 2 cloves garlic, minced (or 1 tsp pre-minced if you’re in a hurry)
- 1 packet taco seasoning (about 2 tbsp – I use McCormick’s but any keto-friendly blend works)
- 1 cup cauliflower rice (fresh is ideal, but frozen works in a pinch – just thaw and squeeze out excess water)
- 1 cup shredded cheddar cheese (sharp cheddar gives the best flavor punch!)
- 1/2 cup diced tomatoes (fresh or canned – drain if using canned)
- 1/4 cup chopped cilantro (optional but SO good)
- Salt and pepper to taste (I usually add about 1/2 tsp salt and 1/4 tsp pepper)
See? Nothing fancy or hard-to-find here. Just simple, real ingredients that come together to make something amazing. Now let’s get cooking!
Equipment You’ll Need
Don’t worry – you don’t need any fancy gadgets for this one. Just grab these kitchen basics (I bet you already have most of them!):
- Large skillet (12-inch is perfect – cast iron gives great browning, but nonstick works too)
- Wooden spatula or spoon (for stirring and scraping up all those tasty browned bits)
- Sharp knife (to tackle that onion and garlic – though pre-minced saves time)
- Cutting board (obvious, but I’ve forgotten mine mid-recipe before – oops!)
- Measuring spoons (for the taco seasoning – eyeballing it can get dangerous)
- Cheese grater (optional – pre-shredded works, but fresh grated melts so much better)
That’s it! No special equipment, no single-use tools cluttering your drawers. Just simple stuff that gets the job done deliciously.
How to Make Cheesy Keto Taco Skillet with Cauliflower Rice
Alright, let’s get cooking! This comes together so fast, you’ll want to have everything ready to go. I like to pretend I’m on one of those cooking shows where everything’s prepped in cute little bowls – though in reality, my kitchen usually looks like a tornado hit it by the end!
Step 1: Sauté the Aromatics
First, grab your trusty skillet and heat that olive oil over medium heat. You’ll know it’s ready when the oil shimmers slightly – about 30 seconds. Toss in your diced onions and give them a good stir. Now here’s the key – don’t rush this part! Let those onions cook for 3-4 minutes, stirring occasionally, until they turn translucent and sweet. That’s when you add the garlic – just 30 seconds more until it becomes fragrant (but not brown!). Your kitchen should smell amazing by now.
Step 2: Brown the Ground Beef
Time for the beef! Crumble it into the skillet with your hands or a spoon – I like making small chunks so every bite gets some beefy goodness. Break it up as it cooks, scraping the bottom of the pan to get all those tasty browned bits. This usually takes about 5-6 minutes over medium heat. You’ll know it’s ready when there’s no more pink spots and the meat has some nice caramelized edges. Drain any excess fat if you want, but I usually leave about a tablespoon for extra flavor.
Step 3: Add Taco Seasoning and Cauliflower Rice
Now for the flavor bomb – sprinkle that taco seasoning over the beef and stir like crazy to coat everything evenly. The second that spicy aroma hits your nose, add the cauliflower rice. Here’s my trick – stir it well, then press it down gently with your spatula to help it soak up all those juices. Cook for 5-7 minutes, stirring occasionally, until the cauliflower is tender but still has a slight bite (no one likes mushy cauliflower!). Taste and add salt if needed – some seasoning blends are saltier than others.
Step 4: Melt the Cheese and Garnish
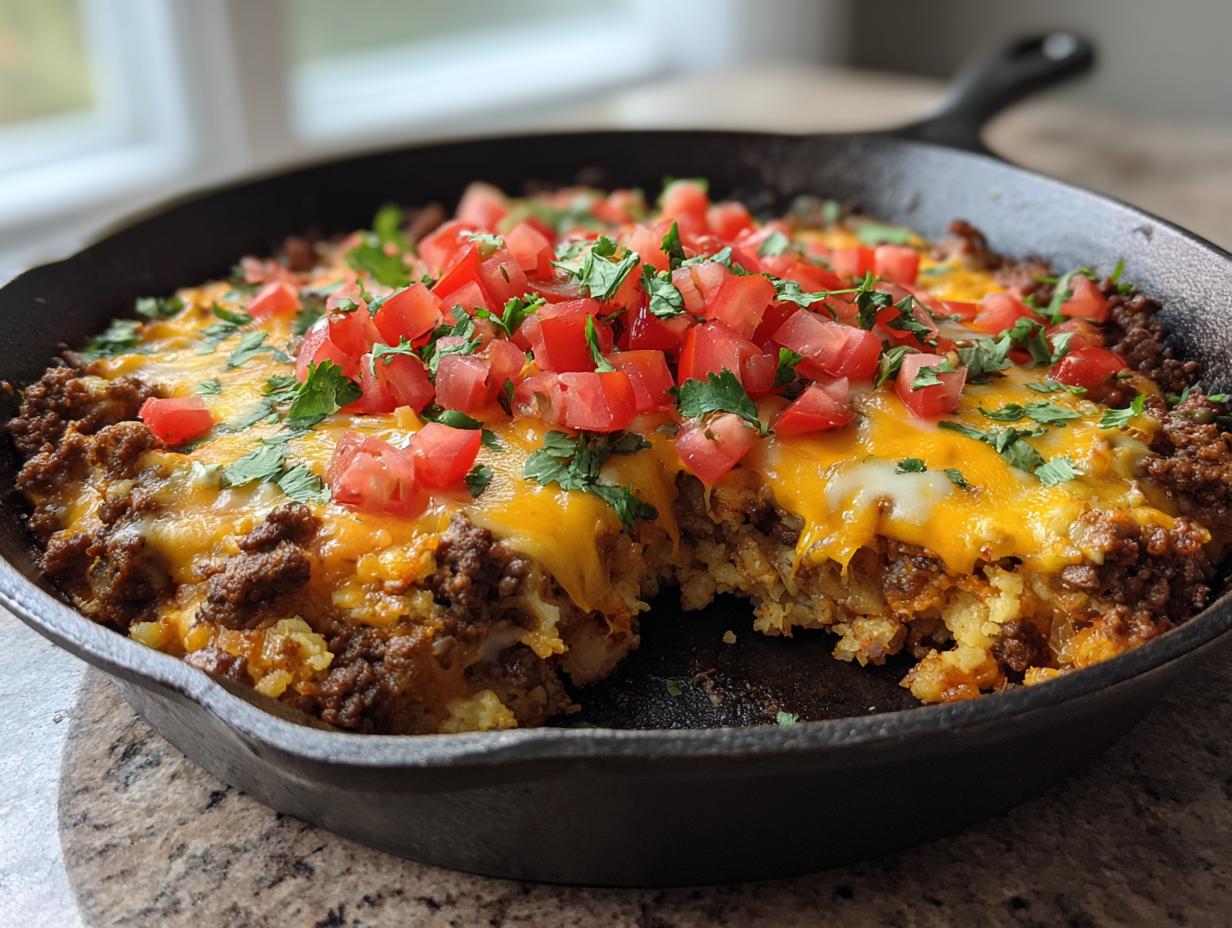
The best part – cheese time! Turn the heat to low and sprinkle that shredded cheddar evenly over the top. Cover the skillet with a lid (or foil if you don’t have one) and let it sit for 2-3 minutes – just until the cheese turns into that perfect, gooey blanket we all love. While you wait, grab your tomatoes and cilantro. When the cheese is melted, take it off the heat and scatter the fresh toppings over the top. The contrast of cool tomatoes and hot cheesy beef? Absolute perfection.
And that’s it! Serve it right from the skillet for maximum “wow” factor. Watch how fast it disappears – I dare you to try saving leftovers!
Tips for the Perfect Cheesy Keto Taco Skillet
Okay, let me share all my hard-earned secrets for making this taco skillet absolutely foolproof. These little tricks make ALL the difference between good and “oh-my-gosh-can-I-marry-this-dish” amazing:
Fresh cauliflower rice is key! The bagged refrigerated kind works great, but if you’re using frozen, thaw it first and squeeze out every drop of excess water with a clean kitchen towel. Wet cauliflower rice turns your skillet into a soggy mess – trust me, I learned this the hard way!
Spice control: That taco seasoning packet can sneak up on you! If you’re sensitive to heat, start with half the packet and taste before adding more. My kids prefer it milder, so I often add extra cumin and smoked paprika instead of the full spice load.
Don’t overcook the cauliflower! Set a timer for 5 minutes when you add it – you want tender-crisp, not mush. It keeps cooking a bit from residual heat even after you turn off the burner, so err on the firmer side.
Cheese matters: Pre-shredded bags are convenient, but they contain anti-caking agents that make the melt less smooth. Take 2 extra minutes to grate a block of sharp cheddar – the creaminess is worth it! For extra indulgence, try a Monterey Jack and cheddar blend.
Brown that beef properly: Don’t just gray it – let it get some crispy, caramelized bits for maximum flavor. I leave it undisturbed for a full minute before stirring to create those tasty brown spots. Drain excess fat only if there’s more than a tablespoon pooling.
Garnish right before serving: Those fresh tomatoes and cilantro add brightness, but they’ll wilt if added too early. I prep them while the cheese melts so everything stays crisp and vibrant.
Follow these tips, and you’ll have a taco skillet that’s restaurant-quality every single time. My family can tell when I’ve rushed it – this dish rewards patience with incredible flavor!
Variations for Your Cheesy Keto Taco Skillet
Listen, the beauty of this recipe is how easily you can make it your own! Here are my favorite twists – some born from pantry emergencies, others from pure experimentation (and hey, some from just being lazy!).
Protein swaps: Not feeling beef? Ground turkey works great (add an extra tbsp oil since it’s leaner). Chicken works too – just chop it small. For vegetarian pals, crumbled tofu or mushrooms are surprisingly awesome – season them extra well!
Cheese adventures: Cheddar’s classic, but try pepper jack for a spicy kick or a Mexican blend for extra meltiness. My wildcard? A sprinkle of cotija on top for salty crunch – it’s magic!
Veggie boost: Toss in diced bell peppers with the onions for color and crunch. Zucchini (squeezed dry!) or spinach work too – just add them with the cauliflower so they don’t get mushy.
Heat lovers: Add a diced jalapeño with the onions (remove seeds if you’re a wimp like me). Or stir in a spoon of adobo sauce from chipotle peppers – smoky AND spicy!
Tex-Mex twist: Black olives, avocado chunks, or a dollop of guac take this to party food status. Just watch the carbs if you’re strict keto.
The moral? Play with your food! This skillet forgives almost anything – except maybe forgetting the cheese. Never forget the cheese.
Serving Suggestions
Oh, the fun part – dressing up your masterpiece! This skillet is delicious on its own, but here are my favorite ways to take it from “yum” to “OMG I need this every day”:
- Avocado everything: Slices on the side, chunks mixed in, or a quick guacamole dollop – that creamy fat is keto gold!
- Low-carb tortillas: Warm them up and make little tacos, or cut them into chips for scooping. My kids go crazy for this.
- Cool contrast: A spoonful of full-fat sour cream or Greek yogurt cuts through the richness perfectly.
- Crunch factor: Toasted pumpkin seeds or crushed pork rinds add texture without carbs.
- Salad bed: Serve over crisp romaine for a taco salad vibe – just add a squeeze of lime!
My personal favorite? A big bowl with all the toppings, eaten with a spoon like a hungry caveman. No judgment at the dinner table here!
Storing and Reheating Your Cheesy Keto Taco Skillet
Okay, let’s talk leftovers – because let’s be real, this skillet is so good you’ll want to make extra on purpose! Here’s how to keep it tasting fresh and fabulous:
Storage smarts: Scoop any leftovers into an airtight container while they’re still warm (but not piping hot). It’ll keep beautifully in the fridge for up to 3 days – any longer and the cauliflower gets a bit too friendly with the moisture.
Freezer hack: Surprise! This actually freezes well for up to 2 months. Portion it out before freezing so you can grab single servings. Just leave off the fresh garnishes – add those after reheating.
Reheating like a pro: The stovetop is your best friend here. Just toss a portion into a skillet over medium-low heat with a splash of water or broth. Stir occasionally until heated through – about 5 minutes. The cheese will get all melty again like magic!
Microwave Plan B: In a pinch, microwave in 30-second bursts, stirring between each one. Cover with a damp paper towel to prevent the cheese from turning into rubber. Not quite as perfect as stovetop, but it’ll do in a lunchtime rush!
Revival trick: If it seems dry after storage, stir in a pat of butter or drizzle of olive oil while reheating. Fresh toppings are a must – they perk up the flavors like nobody’s business.
Trust me, the next-day version might even be better than fresh – the flavors have time to really cozy up to each other in the fridge. Just try not to eat it straight from the container at midnight… not that I’ve ever done that.
Nutritional Information
Alright, let’s talk numbers – but don’t worry, we’re keeping it simple! Here’s the nutritional breakdown per serving (about 1/4 of the skillet), but remember: these values are estimates and can vary based on your specific ingredients (like how lean your beef is or which cheese you choose).
- Calories: 350
- Fat: 25g (10g saturated – that’s the good stuff!)
- Protein: 22g (hello, muscle fuel!)
- Total Carbs: 6g
- Fiber: 2g
- Net Carbs: 4g (perfect for keto!)
- Sugar: 3g (mostly from the tomatoes)
- Sodium: 450mg
A quick heads-up: if you’re tracking macros strictly, your numbers might shift a bit depending on your taco seasoning brand or whether you use pre-shredded cheese (those sneaky anti-caking agents add carbs!). But honestly? This dish is such a nutritional win – packed with protein, loaded with flavor, and keeping those carbs low enough that you might actually have room for dessert. Now THAT’S what I call a balanced meal!
Frequently Asked Questions
I get questions about this taco skillet ALL the time – here are the answers to everything you might be wondering before diving in:
Can I use frozen cauliflower rice?
Absolutely! Just thaw it first and squeeze out ALL the excess water in a clean kitchen towel (seriously, wring it like you’re mad at it). Frozen works in a pinch, but fresh gives the best texture.
Is this recipe spicy?
It’s as spicy as your taco seasoning makes it! Most store-bought packets are mild-medium. For less heat, use half the packet. Want more kick? Add diced jalapeños or a pinch of cayenne when browning the beef.
Can I meal prep this?
You bet! It keeps beautifully for 3 days in the fridge – just reheat gently on the stovetop with a splash of broth. I often double the recipe and portion it out for easy lunches. Add fresh garnishes after reheating.
What if I don’t eat beef?
Ground turkey or chicken work great (add extra oil). For vegetarian, try crumbled tofu or mushrooms sautéed until crispy. The seasoning does all the heavy lifting flavor-wise!
Can I freeze leftovers?
Yes! Freeze in portions for up to 2 months. Thaw overnight in the fridge, then reheat slowly on the stovetop. The texture changes slightly, but it’s still delicious – perfect for emergency keto meals!
Ready to Make This Recipe?
Alright, kitchen warrior – you’ve got all the secrets now! This cheesy keto taco skillet is literally waiting to happen in your kitchen tonight. Don’t just bookmark it and forget it (we’ve all been there) – make it your mission this week! I promise it’s easier than you think, and that first cheesy, savory bite will have you wondering why you ever bothered with carb-heavy tacos.
When you do make it (because you totally will), I’d love to hear how it turns out! Did your kids go nuts for it? Did you add any crazy toppings? Maybe you discovered an even better cheese combo? Shoot me a message or tag me on social – I live for these kitchen success stories. Nothing makes me happier than seeing someone fall in love with a recipe that started as a happy accident in my own messy kitchen.
Now go forth and skillet! May your cheese be melty, your cauliflower perfectly tender, and your keto journey delicious. This recipe’s about to become your new best friend – you can thank me later!
For more delicious recipes and inspiration, check out my Pinterest page!
Print
25-Minute Cheesy Keto Taco Skillet – Irresistible Low-Carb Bliss
- Total Time: 25 mins
- Yield: 4 servings 1x
- Diet: Low Carb
Description
A quick and delicious low-carb meal packed with flavor, perfect for keto diets.
Ingredients
- 1 lb ground beef
- 1 tbsp olive oil
- 1 small onion, diced
- 2 cloves garlic, minced
- 1 packet taco seasoning
- 1 cup cauliflower rice
- 1 cup shredded cheddar cheese
- 1/2 cup diced tomatoes
- 1/4 cup chopped cilantro
- Salt and pepper to taste
Instructions
- Heat olive oil in a skillet over medium heat.
- Add diced onion and cook until softened.
- Add minced garlic and ground beef, cooking until browned.
- Stir in taco seasoning and cauliflower rice.
- Cook for 5-7 minutes until cauliflower is tender.
- Sprinkle shredded cheese on top and let it melt.
- Garnish with diced tomatoes and cilantro.
- Serve hot.
Notes
- Use fresh cauliflower rice for best texture.
- Adjust taco seasoning to taste.
- Store leftovers in an airtight container for up to 3 days.
- Prep Time: 10 mins
- Cook Time: 15 mins
- Category: Main Dish
- Method: Stovetop
- Cuisine: Mexican
Nutrition
- Serving Size: 1/4 of recipe
- Calories: 350
- Sugar: 3g
- Sodium: 450mg
- Fat: 25g
- Saturated Fat: 10g
- Unsaturated Fat: 12g
- Trans Fat: 0g
- Carbohydrates: 6g
- Fiber: 2g
- Protein: 22g
- Cholesterol: 80mg